November 25, 2009

Apple Pie


(Updated 1.8.22) Apple pie making is one of those few talents in life I feel complete confidence in, and maybe am even a little braggy about-- just ask my sister. We used to have an annual "Apple Weekend" during which we picked apples and cooked and baked a whole bunch of dishes with them, culminating in a decadent feast at the end of the day. We of course had to make it a competition and there was always an apple pie competition as the dessert. My sister, our good friend, and I were usually the three bakers and while there were very nice touches in their two pies each year, mine always won in the blind taste test and voting that we subjected our whole families to. (I don't think I ever won the savory dish competition, so there's a little humility from me on this subject.) 

Anyhow, I use my King Arthur pie pastry recipe always always. I took a pie class there years ago and that recipe is a real winner. So good. Another key is a generous amount of apples, a generous amount of sugar, and plenty of cinnamon-- a few shakes is not enough; I thoroughly coat the apples. The final touch is to brush the whole crust with an egg-white wash. This I think helps it crisp up and have that beautiful golden-brown look. Then I sprinkle-- again generously-- the whole thing with large sugar sprinkles, crystallized sugar. You really have to try this pie. :)   


Apple Pie

King Arthur Pie Pastry, ready to be rolled out 
about 14 Macintosh apples (I levelly fill a large mixing bowl with them)
1 C sugar, heaped 
1/4 C flour, heaped 
lots of cinnamon 
egg-white wash (one egg white with a tiny bit of water whisked in)
crystallized sugar 

To prepare filling, peel and slice a bunch of apples. (You can do this by hand but I have really enjoyed this contraption we have that suctions to the countertop and peels, cores, and slices all at once. Check out video above of my six-year-old in action using it.) The right amount will mound in pie plate so I find it is right to fill to the brim a reasonably large bowl with peeled sliced apples. Toss with sugar, flour, and a generous amount of cinnamon. If it doesn't have a nicely coated brownness throughout, sprinkle with more cinnamon. (I usually add more cinnamon, stir and check how coated it is a few times.) 

Remove one of two chilled rounds of pie pastry from the fridge. Roll on a floured surface from the center outward till it's larger than your pie plate. You have to dust the top and underneath it with flour a few times in the process so it doesn't stick. Fold in half, then in half again-- OR roll it up loosely on your rolling pin. Then lift and place centered in pie plate. Press down a bit in pie plate. If you'd like to, trim edges so they don't hang down more than about an inch or so. (I don't trim; extra crust in certain spots around the edge won't be a problem.) 

Add apple filling. 

Roll out second crust and place on top of pie in the same way. Trim the edges if desired (again, I don't), making sure the top crust remains a little longer than the bottom crust. Fold the top crust so it's wrapped around and tucked under the bottom crust. Pinch or seal all the way around in some way. (My favorite method is this: Hold thumb and index finger of left hand above the pie just inside the perimeter. With the forefinger of my right hand held vertical 90 degrees to the pie, push the crust perimeter in toward the middle of the pie between the two left-hand fingers. Continue this every inch or so all the way around the pie. 

Brush whole top crust with the egg-white wash with a pastry brush, then sprinkle liberally with crystallized sugar. Make 5 or 6 cuts with a sharp knife toward the top center of the pie for steam to escape. 

Place pie plate on a rimmed baking sheet in case of leakage and bake at 350 for about 1 hour till beautifully golden, turning partway through the baking time. Let cool up to several hours-- but it is by far the best when eaten the day you make it!

October 14, 2009

Creme Brulee

Brenna

The following amounts make a big batch; I halved it when I made it. You can either make regular creme brulee with this recipe, or for black-bottomed creme brulee (with a yummy chocolate layer beneath it), follow the chocolate directions at the bottom first.


Regular Creme Brulee (do this second if making chocolate version):

1 quart cream
1 C sugar
1/2 - 1 whole vanilla bean
12 yolks
sugar in the raw

Preheat oven to 350.

Heat cream with sugar and scraped-out vanilla bean (both the bean and the contents). When it starts to boil (when it's heated through and the sugar is dissolved), turn it off. Remove vanilla bean.

Temper the hot cream mixture into the yolks: With yolks whisking, add cream a little at a time. Put mixture in fridge for half an hour to cool before pouring onto the chocolate if doing that version.

After it's cooled, or right away if not doing chocolate, put brulee dishes into a roasting pan (either empty dishes or already with chocolate in them if doing the version with chocolate below). Ladle mixture into brulee dishes. Dishes can be as full as you want, as it doesn't rise at all when it bakes. Cover pan almost all the way with foil, leaving a small opening. Set pan in oven, then pour water into the pan, around the dishes, till water level comes about halfway up the dishes. Seal the foil down. Poke a few holes in the foil with a paring knife.

Bake and begin checking them after about 15 minutes (mine took twice that, I think). They are done when they are set; jiggle the pan a bit or gently touch the brulee to check.

Let sit until cool before removing dishes from roasting pan. Just before serving, dust generously with sugar (preferably sugar in the raw) and shake off excess. Then torch them till bruleed.

Black-Bottomed Creme Brulee (do this first if making this version):
4 oz. semisweet chocolate
1/4 C cream

Chop chocolate.

Heat cream until it starts to boil, then pour it over chocolate. Let sit 30 seconds, then whisk until smooth.

Put a spoonful or two in the bottom of each brulee dish; put dishes in the fridge so the chocolate gets firm.

Ramen Noodle Slaw

Anne

A great potluck dish.

Salad:
1 bag broccoli slaw
1 bag coleslaw
1 bag slivered almonds, toasted
1 C sunflower seeds
2 packages Ramen noodles, beef flavor

Dressing:
1 C canola oil
1/2 C sugar
1/3 C white vinegar
seasoning from Ramen noodles

Stir dressing together. Crunch up noodles. Mix dry ingredients together; stir in dressing. Chill before serving to soften noodles slightly.

August 11, 2009

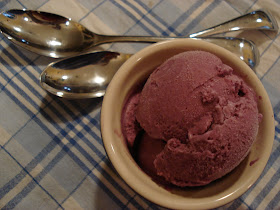
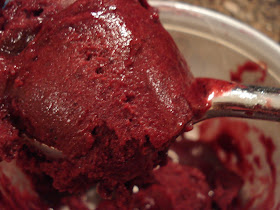
Blueberry Ice Cream

Epicurious

It's blueberry season!


2 C picked-over blueberries
3/4 C sugar
1/8 t salt
1 C milk
1 1/2 C heavy cream

In a saucepan, bring berries, sugar, and salt to a boil over moderate heat, mashing berries and stirring with a fork. Simmer mixture, stirring frequently, 5 minutes and cool slightly.

In a blender, puree mixture with milk just until smooth, and stir in cream. Pour puree through a sieve into a bowl, pressing on solids with the back of a spoon. Chill mixture at least 2 hours, or up to 1 day, until cold.

Freeze ice cream in an ice-cream maker then transfer to airtight container to store in freezer.

Strawberry (or other Berry) Sorbet

Brenna

I've made this with both strawberries and blueberries. I love the egg test at the end to ensure perfect taste and texture.


several cups of berries, frozen or fresh
simple syrup (equal parts sugar and water, heated until sugar dissolves; can be stored in fridge, covered, for several weeks)
1/2 t lemon juice (optional)

Fill medium saucepan 1/2 to 3/4 full with berries. Add a small amount of water. Simmer on low just long enough to be soft and mushy.

Pour contents of saucepan into a blender and blend till very smooth. Strain through a fine sieve.

Now, add a little simple syrup and stir and do the egg test: gently set a whole, uncracked egg into the sorbet. When the sorbet is perfectly sweet, meaning it has the right amount of sugar so that it's a great consistency and not icy, the egg will partially float and you will only see between a dime- and a nickel-sized portion of the egg. If none of the egg shows, remove the egg, add more simple syrup, and try again. If a lot of the egg shows, there is too much sugar in the sorbet, so add a little water, and try again. It really works; I was very impressed!

Butterscotch Bark Cake

My mom would often make this when I was a kid. Named for the bark-like designs in the frosting you make with the tines of a fork, this cake is perfect for picnics or potlucks-- you don't need a fork as you just slice it into bars and hand it out. (Below is my son's first post-Covid birthday party when he requested this cake and we did exactly that, starting with his very own piece in which we stuck his candles.) With butterscotch melted into the cake batter, and chocolate chips in the frosting that don't entirely get melted in the mixing it's an easy, delicious standby treat that I love having in the fridge. 


Butterscotch Bark Cake   

Cake:

1 C quick-cooking oats
6 oz. butterscotch chips 
3/4 C sugar 
1/2 C brown sugar 
12 C butter 
2 eggs 
1 1/2 C flour 
1 t baking soda 
1/2 t salt 
1/2 C raisins 
1/2 C nuts (I leave these out) 

Preheat oven to 350. Combine 1 1/2 C boiling water and oats. Let stand.

Melt butterscotch chips over hot (not boiling) water. Set aside.

Combine sugars and butter. Beat well. Beat in eggs. Blend in oats and butterscotch. Add flour, soda, and salt. Beat well. Add raisins and nuts, if using.

Pour into greased 9 x 13" pan. Bake 25 - 35 minutes. Let cool completely before frosting.

Frosting

1/4 C milk 
2 T butter 
1/2 t salt 
6 oz. semisweet chips 
1 t vanilla 
1 1/2 C confectioner's sugar

Put chips, vanilla, and sugar in large mixing bowl.

Combine milk, butter, and salt. Bring just to a boil. Pour over chips vanilla, and sugar in mixing bowl and start beating immediately (the idea is that the chips will mostly but not completely melt into the frosting). If frosting is too stiff, add more milk; if too soft, add more confectioner's sugar. Beat until almost smooth. Spread on cooled cake and make bark designs with a fork. Store in the refrigerator.

July 23, 2009

Roasted Beets and Blue Cheese


[Updated Aug. 11, 2021] Beets in our life is the reason I am most glad that we were CSA members for several years. I still love the concept of a CSA, but we have our own full garden now. And the best reason for the CSA for us personally was that it taught us, as young adults, what things were actually growing right now where we lived-- and now we know. It presented us with surprises every week that were in season, as good as we were ever going to get them, and we had to figure out what to do with them. In the case of beets, we'd both had beets before, but not a lot and never prepared like this. Now, pretty much because of this salad alone, they are a staple in our garden every year.

I think my sister taught me to roast them and serve them this way (see below for details). Once they've roasted until tender, the skins rub off so easily. Then I usually slice the beets with an egg slicer-- works great! We fan out the sliced, cooked, cooled beets and season them with salt and pepper, drizzle with olive oil and balsamic glaze (available from the store) or balsamic reduction, and sprinkle with crumbled blue cheese-- and serve the dressed-up beets with lettuce if we have it. Beets are a strong, rich, and earthy in flavor. So is blue cheese. I don't think I'd want a lot of either all by themselves. But together the two seem to perfectly complement each other. Beet and blue cheese salad is a good vegetarian meal with bread on the side, or an absolutely scrumptious side salad to anything, especially red meat. 


Beet and Blue Cheese Salad

1 bunch beets
salad greens
blue cheese
olive oil
balsamic reduction, or just balsamic vinegar
salt, pepper

Preheat oven to 400. Rinse and trim the ends off beets. (I use a plastic cutting board for beets rather than the wooden one where I cut most other vegetables because beets definitely stain.) 

Put them flat-side-down in a heavy cooking pot (I use our smaller Le Creuset). Add water until it's about halfway up the beets. Cover, and roast about 45 minutes-- until they are tender throughout when pierced with a fork. (It will take more or less time depending on how large the beets are.) Remove beets from pan and let cool. 

Once cool, the skin rubs off very easily. (If you haven't prepared them far in advance and need to peel them while they are still hot, you can hold them under rubbing water while removing the skins.) 

Slice peeled beets as desired-- I have found placing the cooked beets on an egg slicer works great! Season beets with salt and pepper, drizzle with balsamic reduction and oil, and sprinkle generously with crumbled blue cheese. Serve with lettuce or as is. 

Strawberry Ice Cream

Gourmet, August 2009

I realized I have no ice-cream recipes on here! How can that be? So, here's a delicious, pure-tasting strawberry one I made just this week, from the most recent Gourmet.

1 lb. strawberries, trimmed
3/4 C sugar
3/4 t lemon juice
1/8 t salt
2 C heavy cream

Coarsely mash strawberries with sugar, lemon juice, and salt using a potato masher in a large bowl. Let stand, stirring and mashing occasionally, 10 minutes (don't mash too much if you want visible strawberry chunks in the ice cream).

Transfer half of strawberry mixture to a blender and puree with cream until smooth. Return strawberry cream to bowl with remaining strawberries and chill, stirring occasionally, until very cold, 3 to 6 hours (I didn't do this because I was working with just-thawed strawberries that I had picked and frozen a few weeks ago, so the mixture was cold enough already).

Freeze ice cream in ice-cream maker. Put in freezer to firm up.

June 26, 2009

Caesar Salad and Open-Faced Radish Sandwiches


We signed up for a CSA (community-supported agriculture) program this summer for the first time and it's been wonderful. It began the first week of June and goes through much of October. We are eating far more vegetables-- because we're determined not to let the weekly box contents go to waste-- and everything is so yummy because it is in season right now and grown just up the road in Fairlee. I'm also learning more about what's actually in season around here through this experience. So far we've had mostly salad greens-- several different heads of lettuce, bags of spinach, arugula, and other mixed greens. We've also received bunches of radishes in beautiful colors-- red, pink, purple, white-- plus one head of broccoli and some turnip greens. This means we've had entrĂ©e salads more nights than not for dinner this month. We've had some yummy ones: arugula tossed in e-v olive oil and salt with toasted pine nuts and shaved parmesan on top, and greens with brie, caramelized walnuts, and a simple oil-and-cider-vinegar dressing (notice a cheese theme?). For this simple Caesar, I love to add fresh, hard-boiled eggs on top if we have them. 

One CSA box item I had to think hard about was how to use radishes, as I have never bothered to buy them before. Upon searching for ideas, we found that radish and cucumber is a common combination. (We enjoyed radish-cucumber-lettuce-cream-cheese sandwiches a few times.) These crunchy, salted, buttery open-faced "sandwiches" on thin slices of baguette feel like the perfect accompaniment to round out the Caesar salad as a meal.


Caesar Salad and Open-Faced Cucumber-Radish Sandwiches
both adapted from Epicurious

Croutons:
1/2-inch cubes baguette or other good bread
olive oil

Dressing (made enough for two nights' dinner and we still have some left):
2 garlic cloves, chopped
6 flat anchovies, rinsed, patted dry, and chopped (I left out)
2 T lemon juice
2 T mayo
1/4 t salt
1/3 C olive oil
2 T water

Salad Components
1/3 C grated Parmesan + some for serving
1 head Romaine lettuce, trimmed and torn up
optional topping: sliced hard-boiled eggs

Open-Faced Sandwiches
thinly sliced baguette
thinly sliced cucumber and/or radish
butter
sea salt

For croutons, preheat oven to 350. Toss bread cubes with oil and salt to taste and spread in rimmed baking pan. Bake until golden, 10 to 15 minutes.

For dressing, in a blender, blend garlic, anchovies, lemon juice, mayo, and salt until smooth. With motor running, add oil in slow stream and blend until emulsified. Add water and blend well.

For salad, I put out on the table for everyone to assemble their own: Romaine, dressing, croutons, Parmesan, sliced egg, and pepper. (If you'd prefer, and as the recipe suggests, toss Romaine with dressing, croutons, Parmesan, and pepper.) 

Assemble open-faced sandwiches: butter each baguette slice. Top with one or several slices of cucumber and/or radish, then sprinkle with sea salt. 

June 22, 2009

Balsamic Reduction

We LOVE tomato-basil-mozzarella salads, with olive oil and balsamic vinegar drizzled on top and salt and pepper. But we recently found that it is particularly wonderful when you use a balsamic reduction instead-- sweeter, darker, and more syrupy. Stella's in Lyme gave us this "recipe;" you can buy it some places as well, usually labelled as balsamic glaze. 

Balsamic Reduction
4 C balsamic vinegar 
1/4 C sugar 

Combine, boil, and reduce to half.

May 28, 2009

Grilled Focaccia

Brenna

I got a gas grill for my birthday and I have been grilling like it's my job! I think half the reason I wanted one was to make grilled focaccia, one of my favorite Brenna creations. I have made it three times in the past week, twice for friends. It's great because you can customize the toppings based on who you're feeding and it's so fun and easy to assemble them-- a perfect summer meal. When my sister makes the dough, she lets it go through all the rising cycles, then freezes it in balls in the freezer so that any day she wants to make grilled focaccia she only needs to thaw the dough and is ready to go. I'm going to try to always have some in my freezer this summer, too. Oh-- the other great thing is that this dough is just made in a stand mixer with the dough hook.
Focaccia Dough:
2 C water
2 T olive oil
1 T salt
1 1/2 t yeast
5 1/2 C flour

Mix water, oil, yeast, flour, and salt in a bowl in that order in a stand mixer on low speed ("Stir") with dough hook until it makes a ball. Feel the dough then. It should feel soft but not sticky or stiff. If it feels sticky, add flour and stir some more. If it feels stiff, add a little water and stir some more; it will take a minute, but the water will work itself into the dough.

When it feels nice, turn up the mixer a notch or two (to speed 2 or 4 on mine, I can't remember), and let it mix for a full minute to develop. Then pick the dough ball up out of the bowl, spray the bowl, and replace the dough into it to rise. Let rise one hour.

Fold the dough over on itself (instead of "punching" it), and let rise one more hour.

Cut the ball into 2 balls (or 4 tiny ones, or leave it as one huge one), and wrap each in plastic wrap and freeze-- or, if using immediately, cover and let rest 20 minutes and then use.

Grilling:
Heat gas grill to fairly high (heat all the way so it's good and hot, then turn down just a bit).

Pat each ball of dough out gently on a floured cutting board. Don't try to make it too thin, or work too hard to stretch it. (I've been cutting each recipe into two balls, so with a ball of dough that size, I find it's perfect if I pat it out to just smaller than the size of the board it's on.)

Thoroughly brush the top surface with olive oil, then generously season with salt and pepper.

Carry the whole board out to your grill. Pick up the dough quickly/gently with both hands and plop it oiled-side-down directly on your grill. Let it grill for about 3 minutes on that side while you thoroughly oil and generously season the top side. When the bottom side is cooked and slightly browned, grasp the focaccia with tongs (I think two pairs, one in each hand, works well) and flip it over on your grill.

If you want, brush with a little olive oil to mosten the top, then quickly top with whatever toppings you desire (see below for ideas) and close the grill for a couple minutes in order to finish cooking the bottom side and to soften/melt any cheese or toppings.

With a pair of tongs, slide the finished flatbread directly back onto its board, place the whole board on your table, and cut into squares with a big knife.

Topping Ideas:
(The possibilities are endless. Perhaps our favorite is the classic tomato-basil-mozz, but Bren and I (mostly her) brainstormed these other ideas.)
  • sliced pear (or peaches) and brie (I LOVE this one)
  • caramelized onions and brie
  • cheese steak: caramelized onions and peppers and steak sliced against the grain on the focaccia, then drizzled after it comes off the grill with melted combination of mozzarella, cream, s, p, and dash of hot sauce
  • goat cheese, roasted red pepper, fresh spinach
  • sausage, pepperoni, mozzarella
  • sliced meatloaf, barbecue sauce, cheddar
  • pastrami, sauerkraut, then drizzled with thousand-island dressing when it comes off the grill
  • buffalo chicken, with chopped celery and bleu cheese dressing added when it's off the grill
  • artichokes, feta, olives, onions, tomatoes

Crepazes (Ham and Cheese Crepe Cake)

King Arthur

This recipe (pronounced cre-PAH-zays) was my favorite from a recent King Arthur crepes class. We've already made it a couple times since. It pairs great with pinot noir and a simple salad (we did arugula tossed in olive oil with some salt, with toasted pine nuts and shaved parm on top). It would also be a nice brunch item, I think.

crepes from Basic Crepes recipe, doubled; you'll need just 12 of them, so you'll have a few leftover for another use
11 thin slices good quality smoked ham
1 8-oz. container creme fraiche
1/2 C grated Gruyere cheese

Preheat oven to 375. Grease an 8-in. round cake pan.

Place a crepe in the bottom of the pan, then a slice of ham, then a tablespoon of creme fraiche. Follow this with another crepe, ham slice, and creme fraiche, and repeat this sequence until you've used up the ham, ending the stack with a crepe and the final smear of creme fraiche (but no ham).

Cover the pan with a sheet of aluminum foil and bake for about 15 minutes.

Remove the pan from the oven and remove foil wrap. Unmold the "cake" onto an oven-safe serving platter or rimmed baking sheet. Cover the top of the cake with grated Gruyere cheese and return it to the hot oven to bake just until the cheese melts.

Serve the crepe cake cut into wedges.

Basic Crepes


This recipe for crepes is from King Arthur Flour via a crepes class I took there. (I have another crepe recipe on this blog, but this one here is our tried and true favorite we go to whenever we make crepes.) My son often requests them for his birthday breakfast. And while I am personally less and less keen on sweet breakfast items as I age-- I wouldn't mind if I never had another pancake or waffle--, I still fall for crepes every time. 

Here are a few of the things I've learned about making crepes well: 
  • Count on the first one being less than perfect.
  • They are a delicious, buttery way to enjoy so many possible accompaniments/fillings-- see the end of this post for our favorites. 
  • They can be rolled, or folded in quarters, or other shapes.
  • This is a recipe where the very few specific ingredients matter. (Once I wanted to make crepes when we were out of eggs, so I substituted a certain quantity of applesauce based on recommendations online. This substitution might work perfectly fine in a banana bread but it did not work for crepes; they wouldn't hold together, tasted odd, and were a waste of homemade applesauce.)
  • One key is to do plenty of whisking, with the goal being to have as smooth and silky a batter as possible. (A Joy of Cooking recipe for crepes says-- in an uncharacteristically carefree statement for that book-- "Ignore the lumps; they will take care of themselves." But I've learned they never really do. Adding things gradually as you whisk is key.)   
  • It seems to work fine to mix up the batter the night before and store in the fridge so you can go straight to cooking them up in the morning if you are so inclined/prepared to do so. 
  • I don't have a crepe maker; we use a nonstick crepe pan that I am very happy with. 
Whisking milk into eggs

Straining batter through a sieve

Holding pan and swiveling it to spread batter immediately after pouring it into hot pan. 

Like snowflakes, no two crepes end up with the same design.

Squeezing fresh lemon juice on a lemon and sugar crepe

Rolled and dusted with confectioner's sugar


Basic Crepes
From King Arthur Flour
This recipe makes about eight 8-in. crepes. 

2 eggs 
1 1/2 C milk 
1/4 t salt (sea or regular, not kosher) 
1 C flour 
2 T unsalted butter, melted 

In a large mixing bowl, whisk the eggs, then add the milk while whisking. 

Gradually add in the salt and flour, whisking to combine. Do plenty of whisking, as the goal is to get rid of as many lumps as possible.

Whisk in the butter. Then dip a spoon in the batter and hold it up. If batter coats the spoon, it's good consistency; if it's too thick, add some milk, a couple teaspoons at a time. 

When consistency is right, strain the batter through a fine sieve into a fresh, lump-free bowl. Let batter rest at least 10 minutes to help smooth lumps. (They explained the flour is wet and the gluten is "knitting itself together.") 

Heat a lightly greased (nonstick spray is fine, as there's plenty of butter flavor in the crepes themselves) pan over medium-high heat. Pour or scoop the batter onto the pan, about 1/3 C at a time for each crepe. Tilt the pan with a circular motion so that the batter coats the surface evenly. It should be quite thin. 

Cook the crepe about 2 minutes, until the bottom is light brown. Loosen with a spatula, turn and cook the other side. Serve hot.

Our Favorite Ways to Enjoy Crepes:

Lemon and Sugar-- this was always on the menu when we took our trip to France several years ago. Its perfection is in its simplicity: just a generous squeeze of fresh lemon juice (about 1/4 of a lemon), and a sprinkle of granulated sugar all over. Even the kids love this one. We juice and sugar the whole crepe, then fold it in quarters. 

Nutella and Sliced Banana-- Who doesn't love Nutella?

Cream Cheese and Berries-- We smear the middle of a crepe with cream cheese, then spoon over that any combination of fruits. (Often, we use frozen fruit from the freezer-- strawberries, blueberries, cherries, etc-- and simmer it with a little cinnamon and sugar in a saucepan while we cook the crepes so it's warm and saucy by the time we sit down.) Roll up and dust with confectioner's sugar. 
 
Crepazes-- This savory ham and cheese crepe cake is delicious with a green salad for brunch, lunch, or dinner. Once the crepes are made, it goes together very quickly.